As car thefts continue to rise, it’s becoming more and more important to ensure the safety and security of your vehicle. One way to do this is by installing a GPS tracker on your car. Not only can GPS trackers help you locate your car in the event of theft, but they can also provide useful information about your car’s whereabouts and activities. In this article, we’ll discuss how to install a GPS tracker on your car.
Introduction
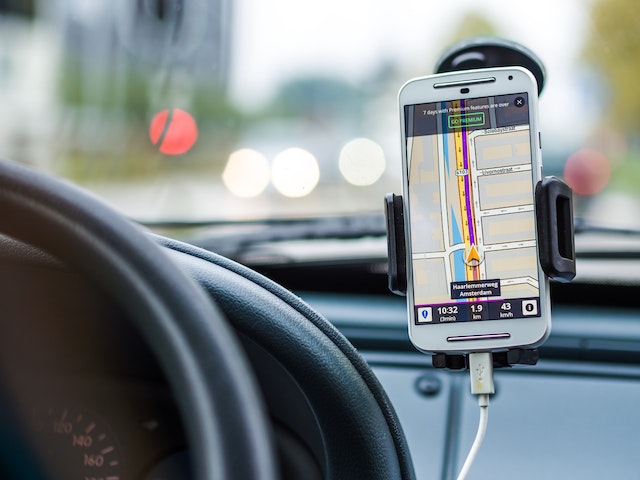
GPS stands for Global Positioning System, a technology that allows users to determine their precise location and track movements. A GPS tracker is a device that uses GPS technology to track the location of an object or person. In the context of cars, GPS trackers can be used to monitor vehicle movements, speed, and other useful data. Installing a GPS tracker on your car can help protect it against theft, track its movements, and even help lower your car insurance premiums.
GPS trackers use a combination of GPS technology and cellular networks to transmit data to a central server, where the information can be accessed by the owner or authorized users. Depending on the type of tracker, the data can be viewed through a mobile app, a web-based interface, or by receiving notifications via email or SMS.
Types of GPS trackers
Before you can install a GPS tracker on your car, you need to choose the right type of tracker for your needs. There are three main types of GPS trackers for cars:
Hardwired trackers
Hardwired trackers are permanently installed in your car and wired directly into the vehicle’s electrical system. They require professional installation and can provide real-time tracking data.
Hardwired GPS trackers require a bit more effort to install compared to other types of trackers. They typically come with a wiring harness that you’ll need to connect to the vehicle’s electrical system. This means that you may need to remove some interior panels or trim to access the wiring, so it’s important to have a basic understanding of your car’s electrical system or seek the help of a professional.
Before starting the installation, make sure to read the manufacturer’s instructions carefully and gather all necessary tools and supplies. You’ll need wire strippers, crimping tools, electrical tape, and a multimeter to test the connections.
Here are the basic steps for installing a hardwired GPS tracker:
- Locate the wiring harness in your vehicle and identify the power and ground wires. You can usually find this information in the vehicle’s owner manual or by consulting a wiring diagram.
- Connect the tracker’s power wire to the vehicle’s power wire using a crimp connector. Make sure to strip a small section of insulation from the wires before connecting them.
- Connect the tracker’s ground wire to a metal part of the vehicle’s chassis using a ring terminal or self-tapping screw. This will provide a solid ground connection for the tracker.
- Connect any other wires or accessories that come with the tracker, such as an external antenna or an ignition sense wire.
- Test the connections using a multimeter to ensure that everything is properly connected and getting power.
- Secure the tracker and wiring using zip ties or adhesive mounts to prevent them from rattling or getting damaged.
- Finally, test the tracker to make sure that it’s working properly and transmitting data to
OBD-II trackers
OBD-II trackers plug into the On-Board Diagnostics (OBD-II) port of your car, which is typically located under the dashboard. They are easy to install and provide a range of useful data about your car, including fuel consumption and engine health. OBD-II (On-Board Diagnostics) trackers are designed to plug directly into a vehicle’s OBD-II port, which is typically located under the dashboard. This port provides access to the vehicle’s diagnostic system and allows the tracker to read and transmit data about the vehicle’s location, speed, and other parameters.
One of the main advantages of OBD-II trackers is that they are easy to install and do not require any special tools or knowledge. Here are the basic steps for installing an OBD-II tracker:
- Locate the OBD-II port in your vehicle, which is usually located under the dashboard on the driver’s side. It may be covered by a plastic panel that can be easily removed.
- Connect the OBD-II tracker to the port, making sure that it clicks into place. The device should power on automatically once it’s connected.
- Install any accompanying software or mobile apps to access the data collected by the tracker.
- Test the tracker to make sure that it’s working properly and transmitting data to the central server.
One thing to keep in mind with OBD-II trackers is that they may be more visible to potential thieves or vandals, as the device is located in plain sight under the dashboard. However, most OBD-II trackers are small and discreet, so they may not be noticeable unless someone is specifically looking for them.
Battery-powered trackers
Battery-powered trackers are easy to install and do not require any wiring. They are typically small and can be hidden in your car’s interior. However, they may have limited battery life and may not provide real-time tracking data. Battery-powered GPS trackers are a popular choice for those who need a portable, easy-to-install tracking solution. These trackers are typically compact and do not require any wiring or permanent installation.
Battery-powered GPS trackers are ideal for tracking items that are not always in use, such as trailers, boats, or recreational vehicles. They can also be used to track people, such as elderly family members or children.
Here are some basic steps for installing a battery-powered GPS tracker:
- Choose the location where you want to install the tracker. It should be a discreet location that is not easily visible to others, such as under a seat or in a glove box.
- Attach the tracker to the location using the included adhesive or magnetic mount. Make sure that the tracker is securely attached and won’t move around during use.
- Install any accompanying software or mobile apps to access the data collected by the tracker.
- Turn on the tracker and test it to make sure that it’s working properly and transmitting data to the central server.
- Check the battery life of the tracker regularly and replace the batteries as needed. Most battery-powered GPS trackers have a battery life of several months or more, depending on usage.
One disadvantage of battery-powered GPS trackers is that they may require more maintenance than other types of trackers, as the batteries will need to be replaced periodically. However, they are a good option for those who need a portable, easy-to-install tracking solution.
Pre-installation Preparation
Before you begin installing your GPS tracker, you’ll need to gather the necessary tools and materials. You’ll also need to choose the best location for installation, which will depend on the type of tracker you’re using. For hardwired and OBD-II trackers, you’ll need to turn off the car’s electrical system before beginning installation.
Installation Steps
The specific steps for installing your GPS tracker will depend on the type of tracker you’re using. Here are the general steps for each type:
Hardwired trackers
- Locate the wiring harness for your car’s electrical system.
- Identify the wires for the ignition, ground, and power.
- Connect the tracker’s wires to the corresponding wires in your car’s wiring harness.
- Mount the GPS tracker in a secure location, such as under the dashboard or in the trunk.
- Test the tracker to ensure proper functionality.
OBD-II trackers
- Locate the OBD-II port in your car,
- Plug the OBD-II tracker into the port.
- Mount the tracker in a secure location, such as under the dashboard or in the glove box.
- Test the tracker to ensure proper functionality.
Battery-powered trackers
- Choose a location to hide the tracker, such as under a seat or in the trunk.
- Securely attach the tracker to the car’s interior using a strong adhesive.
- Test the tracker to ensure proper functionality.
Testing the GPS Tracker
Once you’ve installed your GPS tracker, it’s important to test it to ensure it’s working properly. This can involve verifying that the tracker is transmitting data and that it’s accurately tracking the vehicle’s movements. You should also periodically test the tracker to ensure it’s still functioning correctly and that the battery is charged (if applicable).
If you encounter any issues with your GPS tracker, there are a few common troubleshooting steps you can take. These include checking the wiring connections, resetting the device, or contacting the manufacturer for support.
Conclusion
Installing a GPS tracker on your car can provide valuable peace of mind and protection against theft. Whether you choose a hardwired, OBD-II, or battery-powered tracker, it’s important to follow the manufacturer’s instructions carefully and test the device regularly. By taking these steps, you can enjoy the benefits of GPS tracking and ensure the safety of your vehicle.
FAQs
- Do GPS trackers require a monthly subscription?
- Many GPS trackers do require a monthly subscription to access their tracking data and services. Be sure to check with the manufacturer before purchasing a GPS tracker to understand the ongoing costs involved.
- Can GPS trackers be disabled or removed by thieves?
- While GPS trackers can provide a valuable deterrent against theft, it’s important to note that they can be disabled or removed by determined thieves. However, many GPS trackers have anti-tampering features that can alert you if the device is being interfered with.
- Is it legal to install a GPS tracker on someone else’s car?
- It is generally not legal to install a GPS tracker on someone else’s car without their consent. However, there are some exceptions, such as if you own the vehicle or if you’re a law enforcement agency with a warrant.
- Can GPS trackers be used to monitor the speed of a vehicle?
- Yes, many GPS trackers can provide information about a vehicle’s speed, as well as other data such as location and fuel consumption.
- Can GPS trackers drain a car’s battery?
- Some GPS trackers can drain a car’s battery if left connected for an extended period of time. However, many modern trackers have low power consumption and should not cause significant battery drain. Be sure to read the manufacturer’s instructions carefully and test the device to ensure it’s not draining your car’s battery.