Repainting a car can give it a new lease on life, and make it look as good as new. It can also help protect the underlying metal from rust and other types of damage. However, it’s not a simple process, and there are a lot of steps involved. In this article, we’ll guide you through the process of repainting a car, from start to finish.
1. Introduction
Repainting a car involves a lot of work, but it’s a process that anyone can learn. The key is to take your time, and to follow the steps carefully. Before you begin, it’s important to make sure that you have all of the necessary tools and materials, and that you’re working in a well-ventilated area.
2. Assessing the Condition of the Car’s Paint
Before you can repaint a car, you need to assess the condition of its existing paint. If the paint is in good condition, you may be able to simply clean it and apply a new coat of paint. However, if the paint is peeling, cracking, or chipping, you’ll need to remove it completely.
3. Preparing the Car for Repainting
Preparing the car for repainting is one of the most important steps in the process. This involves cleaning the car, removing the old paint, sanding and filling any imperfections, and masking off any areas that you don’t want to paint.
Cleaning the Car
Before you begin repainting the car, you’ll need to clean it thoroughly. This involves washing it with soap and water, and then drying it off with a clean towel.
Cleaning the car is an important step in the process of repainting it. Before you can start painting, you need to make sure the car is completely clean and free of any dirt, grease, or other contaminants. This is because any dirt or debris on the surface of the car can affect the quality of the paint job, leading to uneven or bumpy areas in the finished product.
To clean the car, you’ll need to start by washing it thoroughly with soap and water. You can use a regular car wash soap, or a specialized product designed for pre-painting preparation. Be sure to rinse the car thoroughly after washing, to remove all traces of soap and dirt.
Once the car is clean and dry, you may need to use a degreaser or other cleaning product to remove any stubborn dirt or grease. This is especially important if you’re working on an older car that may have accumulated years of grime and buildup.
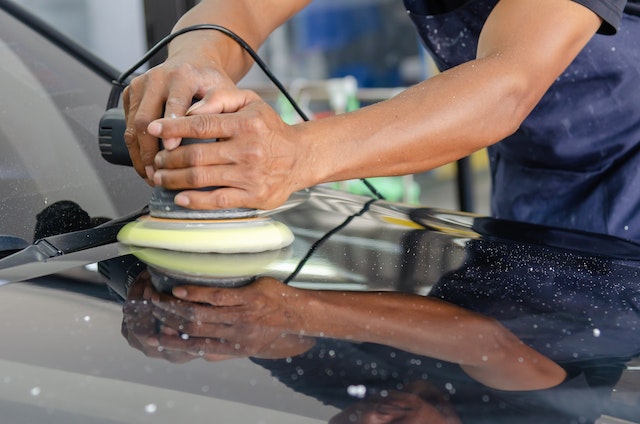
After you’ve cleaned the car, you’ll need to sand it down to create a smooth surface for the paint to adhere to. Sanding can be done using a variety of tools, including sandpaper, a sanding block, or a power sander. You’ll want to start with a coarse grit sandpaper and work your way up to a finer grit, to ensure a smooth and even finish.
Finally, you’ll need to wipe down the car with a tack cloth or other lint-free cloth, to remove any dust or debris that may have accumulated during the sanding process. This will help ensure that the surface of the car is completely clean and ready for painting.
Removing the Old Paint
If the old paint is in poor condition, you’ll need to remove it completely. This can be done using a paint stripper or a sandblaster.
Removing the old paint is an important step in repainting a car, especially if the existing paint is in poor condition. Old paint that is peeling, cracking, or chipping can affect the adhesion of the new paint and lead to an uneven or bumpy finish.
There are several ways to remove old paint from a car, depending on the condition of the paint and the tools available. One common method is to use a chemical paint stripper, which is applied to the surface of the car and left to sit for a period of time before being scraped off with a putty knife or other tool.
Another method is to use a sandblaster or other abrasive tool to blast away the old paint. This can be a more aggressive approach, but it can also be more effective at removing stubborn paint and leaving a smooth surface for the new paint.
Regardless of the method you choose, it’s important to wear protective gear such as goggles, a respirator mask, and gloves, as paint removal can create hazardous fumes and debris.
Once the old paint has been removed, you’ll need to sand down the surface of the car to create a smooth surface for the new paint to adhere to. This can be done using sandpaper or a power sander, and you’ll want to work your way up to a fine grit to ensure a smooth and even finish. After sanding, be sure to wipe down the surface of the car with a tack cloth or other lint-free cloth, to remove any dust or debris that may have accumulated during the sanding process.
Sanding and Filling
After removing the old paint and ensuring that the surface of the car is completely clean, the next step in repainting a car is to sand and fill any imperfections in the bodywork.
Sanding is done to remove any remaining paint or rough spots on the car’s surface, and to create a smooth and even surface for the new paint to adhere to. Sanding can be done using a variety of tools, including sandpaper, sanding blocks, and power sanders. You’ll want to start with a coarse grit sandpaper and work your way up to a finer grit to ensure a smooth and even finish.
Filling is the process of filling in any dents or scratches in the bodywork of the car, using a filler material such as body filler or bondo. This is an important step to ensure that the surface of the car is completely smooth before painting.
To fill in dents or scratches, start by cleaning the area thoroughly with soap and water. Then, use a sanding tool to sand down the edges of the damaged area, creating a shallow depression. Mix the body filler or bondo according to the manufacturer’s instructions, and apply it to the damaged area using a putty knife or other tool. Be sure to smooth out the filler and allow it to dry completely before sanding it down to create a smooth and even surface.
Once the filling and sanding are complete, you’ll need to wipe down the surface of the car with a tack cloth or other lint-free cloth, to remove any dust or debris that may have accumulated during the process. This will ensure that the surface of the car is completely clean and ready for painting.
Masking
Masking is an important step in repainting a car, as it helps to protect areas of the car that are not being painted from overspray and other damage.
To begin the masking process, you’ll want to gather masking tape, plastic sheeting, and other materials that will help you to cover areas of the car that you do not want to paint. This may include areas such as the windows, trim, and tires.
Start by using the masking tape to cover any areas of the car that you want to protect from overspray. Be sure to press the tape down firmly to create a tight seal, and use a razor blade or other tool to cut the tape to fit the contours of the car.
Next, use plastic sheeting to cover larger areas of the car that you do not want to paint. This may include the windshield, windows, and other parts of the car. Use masking tape to hold the plastic sheeting in place, and be sure to press the tape down firmly to create a tight seal.
When masking, it’s important to take your time and be thorough. Even small areas that are not properly masked can result in overspray and other damage to the car’s finish.
Once the masking is complete, you’ll want to inspect the car carefully to ensure that all areas that need to be covered are properly protected. If you notice any areas that are not completely covered, go back and add more masking tape or plastic sheeting as needed.
When you’re satisfied that the car is properly masked and ready for painting, you can move on to the next step in the process: priming.
4. Applying Primer
Applying primer is an important step in repainting a car, as it helps to create a smooth and even surface for the new paint to adhere to. Primer also helps to protect the car’s surface from rust and other damage.
To apply primer, you’ll need to first select the right type of primer for your car. There are several different types of primer available, including etching primer, high-build primer, and self-etching primer. Be sure to choose a primer that is appropriate for your car’s make and model, and follow the manufacturer’s instructions carefully.
Before applying primer, you’ll want to make sure that the surface of the car is completely clean and dry. Use a lint-free cloth or tack cloth to wipe down the surface of the car, removing any dust or debris that may have accumulated.
Next, apply the primer to the car’s surface using a spray gun or other tool. Be sure to apply the primer evenly, using a sweeping motion to cover the entire surface of the car. You’ll want to apply several thin coats of primer, allowing each coat to dry completely before applying the next.
Once the primer is dry, you’ll want to sand it down using a fine-grit sandpaper. This will help to create a smooth and even surface for the new paint to adhere to. Be sure to wipe down the surface of the car with a tack cloth or other lint-free cloth, to remove any dust or debris that may have accumulated during the sanding process.
When the primer is completely dry and sanded, you’re ready to move on to the next step: painting the car.
5. Applying Base Coat
Applying the base coat is the next step in repainting a car. The base coat is the layer of paint that gives the car its color and visual appeal.
Before applying the base coat, you’ll want to make sure that the surface of the car is completely clean and dry. Use a lint-free cloth or tack cloth to wipe down the surface of the car, removing any dust or debris that may have accumulated.
Next, prepare the base coat by mixing it according to the manufacturer’s instructions. Be sure to choose the right color and finish for your car, and follow the manufacturer’s instructions carefully.
When the base coat is mixed and ready to go, you can begin applying it to the car’s surface. Use a spray gun or other tool to apply the base coat in even, sweeping motions. You’ll want to apply several thin coats of base coat, allowing each coat to dry completely before applying the next.
When applying the base coat, it’s important to keep the spray gun or tool at a consistent distance from the car’s surface. This will help to ensure an even application and prevent runs or other imperfections in the finish.
Once the base coat is dry, you’ll want to inspect the car carefully to ensure that the color and finish are even and consistent. If you notice any areas that need touch-ups, you can apply additional base coat as needed.
When you’re satisfied with the base coat, you’re ready to move on to the next step: applying the clear coat.
6. Applying Clear Coat
Applying the clear coat is the final step in repainting a car. The clear coat is a transparent layer of paint that helps to protect the base coat and give the car its shine and luster.
Before applying the clear coat, you’ll want to make sure that the surface of the car is completely clean and dry. Use a lint-free cloth or tack cloth to wipe down the surface of the car, removing any dust or debris that may have accumulated.
Next, prepare the clear coat by mixing it according to the manufacturer’s instructions. Be sure to choose the right type of clear coat for your car, and follow the manufacturer’s instructions carefully.
When the clear coat is mixed and ready to go, you can begin applying it to the car’s surface. Use a spray gun or other tool to apply the clear coat in even, sweeping motions. You’ll want to apply several thin coats of clear coat, allowing each coat to dry completely before applying the next.
When applying the clear coat, it’s important to keep the spray gun or tool at a consistent distance from the car’s surface. This will help to ensure an even application and prevent runs or other imperfections in the finish.
Once the clear coat is dry, you’ll want to inspect the car carefully to ensure that the finish is even and consistent. If you notice any areas that need touch-ups, you can apply additional clear coat as needed.
When you’re satisfied with the finish, you can remove the masking tape and any other protective coverings from the car. Be sure to let the car dry completely before handling or driving it.
Overall, repainting a car can be a time-consuming and labor-intensive process, but with the right tools and techniques, you can achieve professional-looking results. Just be sure to take your time, follow the manufacturer’s instructions carefully, and be patient as you work through each step of the process.
7. Finishing Touches
Once the clear coat has dried completely, you can add some finishing touches to your newly painted car. Here are some things you might want to do:
- Polish and Wax: After the clear coat has dried for at least a week, you can polish and wax the car to give it an extra shine and protection. Use a polishing compound to remove any imperfections or swirls in the clear coat, and then apply a high-quality car wax to protect the paint and give it a deep shine.
- Reattach Trim and Accessories: If you removed any trim or accessories from the car before painting it, be sure to reattach them once the paint is dry. This includes things like door handles, mirrors, and emblems.
- Clean the Interior: Painting a car can be a messy process, so it’s a good idea to clean the interior of the car once you’re finished. This includes vacuuming the carpets and seats, wiping down the dashboard and interior surfaces, and cleaning the windows.
- Check for Imperfections: Finally, take a close look at the car to make sure there are no imperfections or defects in the paint. If you notice any areas that need touch-ups or corrections, be sure to address them as soon as possible.
By taking these finishing touches, you can ensure that your newly painted car looks its best and is ready to hit the road.
8. Letting the Paint Cure
After you’ve finished painting and applying the clear coat, it’s important to let the paint cure properly. Curing is the process of allowing the paint to dry and harden completely, which can take several days or even weeks depending on the type of paint and the weather conditions.
During the curing process, it’s important to avoid washing or waxing the car, as well as exposing it to harsh weather conditions or extreme temperatures. This can interfere with the curing process and result in a less durable finish.
To help the paint cure properly, it’s a good idea to park the car in a dry, sheltered location where it won’t be exposed to rain or direct sunlight. You can also use a car cover to protect the car’s finish.
Be patient during the curing process, and resist the temptation to handle or wash the car before the paint is fully cured. Once the paint has cured, you’ll be able to enjoy your newly painted car for years to come.
9. Conclusion
Repainting a car is a big job, but it can be done by anyone with the right tools and a bit of patience. By following the steps outlined in this guide, you can give your car a new lease on life and make it look as good as new.
10. FAQs
- How much does it cost to repaint a car? The cost of repainting a car can vary depending on the size of the car, the quality of the paint used, and the complexity of the job. On average, you can expect to pay anywhere from $1,000 to $5,000.
- Do I need to remove all the old paint before repainting a car? If the old paint is in good condition, you may be able to simply clean it and apply a new coat of paint. However, if the old paint is peeling, cracking, or chipping, you’ll need to remove it completely.
- Can I repaint my car myself? Yes, you can repaint your car yourself, but it’s a big job that requires a lot of preparation and attention to detail. If you’re not confident in your abilities, it may be best to leave the job to a professional.
- How long does it take to repaint a car? The time it takes to repaint a car can vary depending on the size of the car, the complexity of the job, and the drying time for the paint. On average, you can expect the process to take anywhere from a few days to a few weeks.
- Can I drive my car immediately after repainting it? It’s important to let the paint cure properly before driving the car. This usually takes around 30 days, and during this time, you should avoid washing or waxing the car.